IMAGES BY BILL THORNESS
I’m in the kitchen, chopping veggies. Carrot tips and tops get snipped; winter-rough skin on beets meet the peeler. Halving a delicata squash reveals a string of seeds, which get scooped. The knife swipes right and the veggies hit the sheet pan for roasting.
Then my hands sweep the cutting board and the detritus goes … where?
To feed someone else! I’m tossing all those rejected bits into a copper pail to carry them to the backyard. My worm bin awaits.
When friends ask if we have a dog, I answer, “No, just worms.” Our only pets. Besides being low maintenance, they are a wriggling little mass of helpers for my garden.
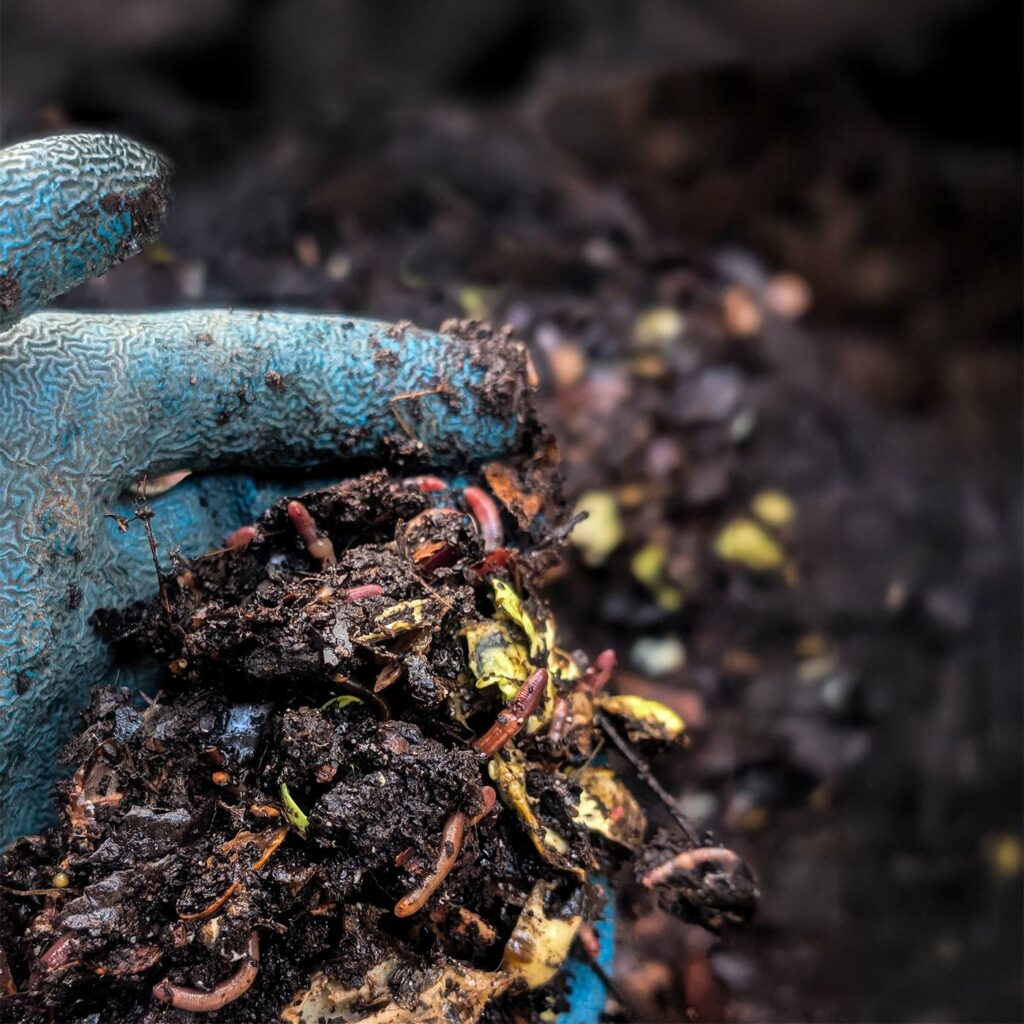
Turns out the “red wigglers” that live in a soft bedding of fallen leaves are great composters, consuming scraps and pooping fertilizer. To be more sciency, Eisenia fetida converts vegetative waste into vermicompost.
A worm bin will help you create this specialized type of compost. Whereas an open pile receives yard trimmings, pruned branches and fallen leaves, a closed worm bin is a kitchen scrap composter.
When you lay the table for the worms, there’s no need for fancy plates and cutlery, just a layer of leaf or paper bedding in which to bury the food. These worms live in the bedding, not soil, so they won’t migrate out of a well-tended bin.
So, how do you make a worm home for your home
When friends ask if we have a dog, I answer, “No, just worms.” Our only pets. Besides being low maintenance, they are a wriggling little mass of helpers for my garden.
The plans to make your own attractive worm bin like this one are available through Tilth Alliance.

CHOOSING A BIN
If you have a yard, shed or garage to house it, a large wooden worm box might be for you. If you’re living more compactly or without a yard, a smaller, Rubbermaid-tub version just might be perfect.
There are commercial bins too, in both tumbler and stacking types, but you can make your own. Tilth Alliance, the edible gardening educators, offer free building plans for the wood and tub versions on their website. Their large worm bin is 24 inches by 48 inches, with a snug lid, so you know there’s a small space investment.
A wooden outdoor box takes a bit of carpentry skill, while an indoor bin is just two nested tubs with strategically drilled vents to drill excess moisture and provide air circulation for your new friends.
PLACEMENT
A few things to keep in mind as you decide on a future home for your worm bin. Firstly, larger wooden bins can be placed in a garage, shed or in a shady part of your yard. The smaller tub-style bins can live easily in a garage or utility room, or outside on your patio. No matter the bin type, avoid spots that would get too sunny and hot in the summer, as the heat could kill your worms. And finally, make sure to place your bin in a convenient place so you’ll actually use it!

WHAT’S ON THE VERMI-MENU?
Not sure what to feed your worms? Here are some basics:
YES
Vegetable and fruit trimmings, skins and small pieces • Cooled coffee grounds, unbleached coffee filters and compostable tea bags • Crushed eggshells
USE SPARINGLY
These items can be oily, mold quickly or are too acidic.
Cooked leftover veggies • Bread, without oils or toppings • Grains • Citrus peelings and onion skins
NO
Avoid these foods; they attract flies, vermin and bad bacteria!
Meat • Fish • Dairy • Eggs • Oily foods like potato chips • Pet waste
CARE AND FEEDING
Set up your bin by filling it with bedding material like fallen leaves, but if you don’t have that, “shredded newspaper is awesome,” says Reingard Rieger, Tilth Alliance’s program manager for the Master Composter Sustainability Steward program, which trains 30 volunteers a year to spread the composting word. You can also shred uncoated office paper or cardboard.
She cautions not to “grab leaves out of the curb” or use evergreen or oak leaves, as these take too long to break down, or can throw the pH of the compost off-balance with their higher acidity, making the finished product less useful.
Finally, add your worms. Best to get them from a friend with an active bin—They multiply quickly under good conditions!—or you can purchase a starter batch. Add food (kitchen scraps) to the bedding by digging a hole, adding the scraps and raking the bedding back over the hole completely, and leave your new friends to their feast! You’ll know the bin is active and healthy if your worms are actively eating the scraps. As they work through your trimmings, they’ll migrate to where the food is, so you can see clearly when to add new food or fresh bedding, and when to remove finished vermicompost, which will be a rich black, with few worms left in it.
Make a habit of checking conditions in your worm bin, at least weekly. Maintain drainage, and remove any leachate (liquid filtering down through the bin, different from compost tea) from plastic bins. Add more food regularly, to keep your worms happy and thriving.
“A worm bin makes a really good project for kids. Children can learn the life cycle of worms and practice taking care of something if they like pets.” —Reingard Rieger
BENEFITS
If you have a garden, the worm castings (worm waste) create compost that serve as a potent fertilizer that can feed your vegetable garden or other outdoor plants, but can also be used on houseplants.
Sure, food scraps can go into a “clean green” city yard waste bin, but keeping more waste on-site lowers your carbon footprint, in addition to the vermicompost saving on fertilizer costs.
Plus, “a worm bin makes a really good project for kids,” Rieger says. Children can “learn the life cycle of worms and practice taking care of something if they like pets.” It also connects them to their hyperlocal food system, showing firsthand techniques for waste reduction in their own backyards.
If you don’t have a use for the vermicompost, you can still make use of a worm bin. “Find a friend who has a garden that needs those nutrients,” Rieger advises, “and trade them for some yummy tomatoes later in the year.”
So, next time you’re prepping dinner, think not only of your family. Snip a little extra for your red wiggling friends, too.
YUCK, IT SMELLS!
Top complaints are odors when the bin is opened, or a cloud of fruit flies rising up. A healthy, active worm bin should have very little odor, and few flies. Here’s some easy troubleshooting: Do not feed the worms more than they can handle in a few days to keep the food inside from becoming moldy.
Do not feed the prohibited items. Their odors can attract vermin and flies.
Always cover the food with bedding, which will keep the flies from landing.
Keep the bedding damp, but not wet—the moisture should be about the same as a wrung-out sponge. Moisture can cause anaerobic conditions and rotten-egg odors. Add bedding to dry the bin out and to keep the worms happy. If they’re crawling up the sides of the bin, it’s too wet or there’s too much food.
For plastic bins, drain off any leachate that accumulates and distribute it in the yard. This liquid is not compost tea, do not use it on food crops. Add bedding to reduce the amount of liquid that drains.
Thoroughly incorporate any new food into the bedding to keep your bin healthy and happy.
